01What You Need
Gather these four things before you open the platform. Missing any one of them stops the setup halfway.
- A display. Any TV or commercial monitor with a free HDMI input.
- A media player. An Android, Chrome OS, or Windows player box that plugs into the HDMI input. Some displays have a player built in — if yours does, you can skip step six.
- Internet at the screen. Wi-Fi or Ethernet. Ethernet is more reliable and worth the cable run if you have the choice.
- Your platform login. The sign-in address, username, and password are in the welcome email we send when your account is created.
02Sign In
The platform is the one place where creatives, playlists, and screens are managed. Nothing is stored on the screen itself.
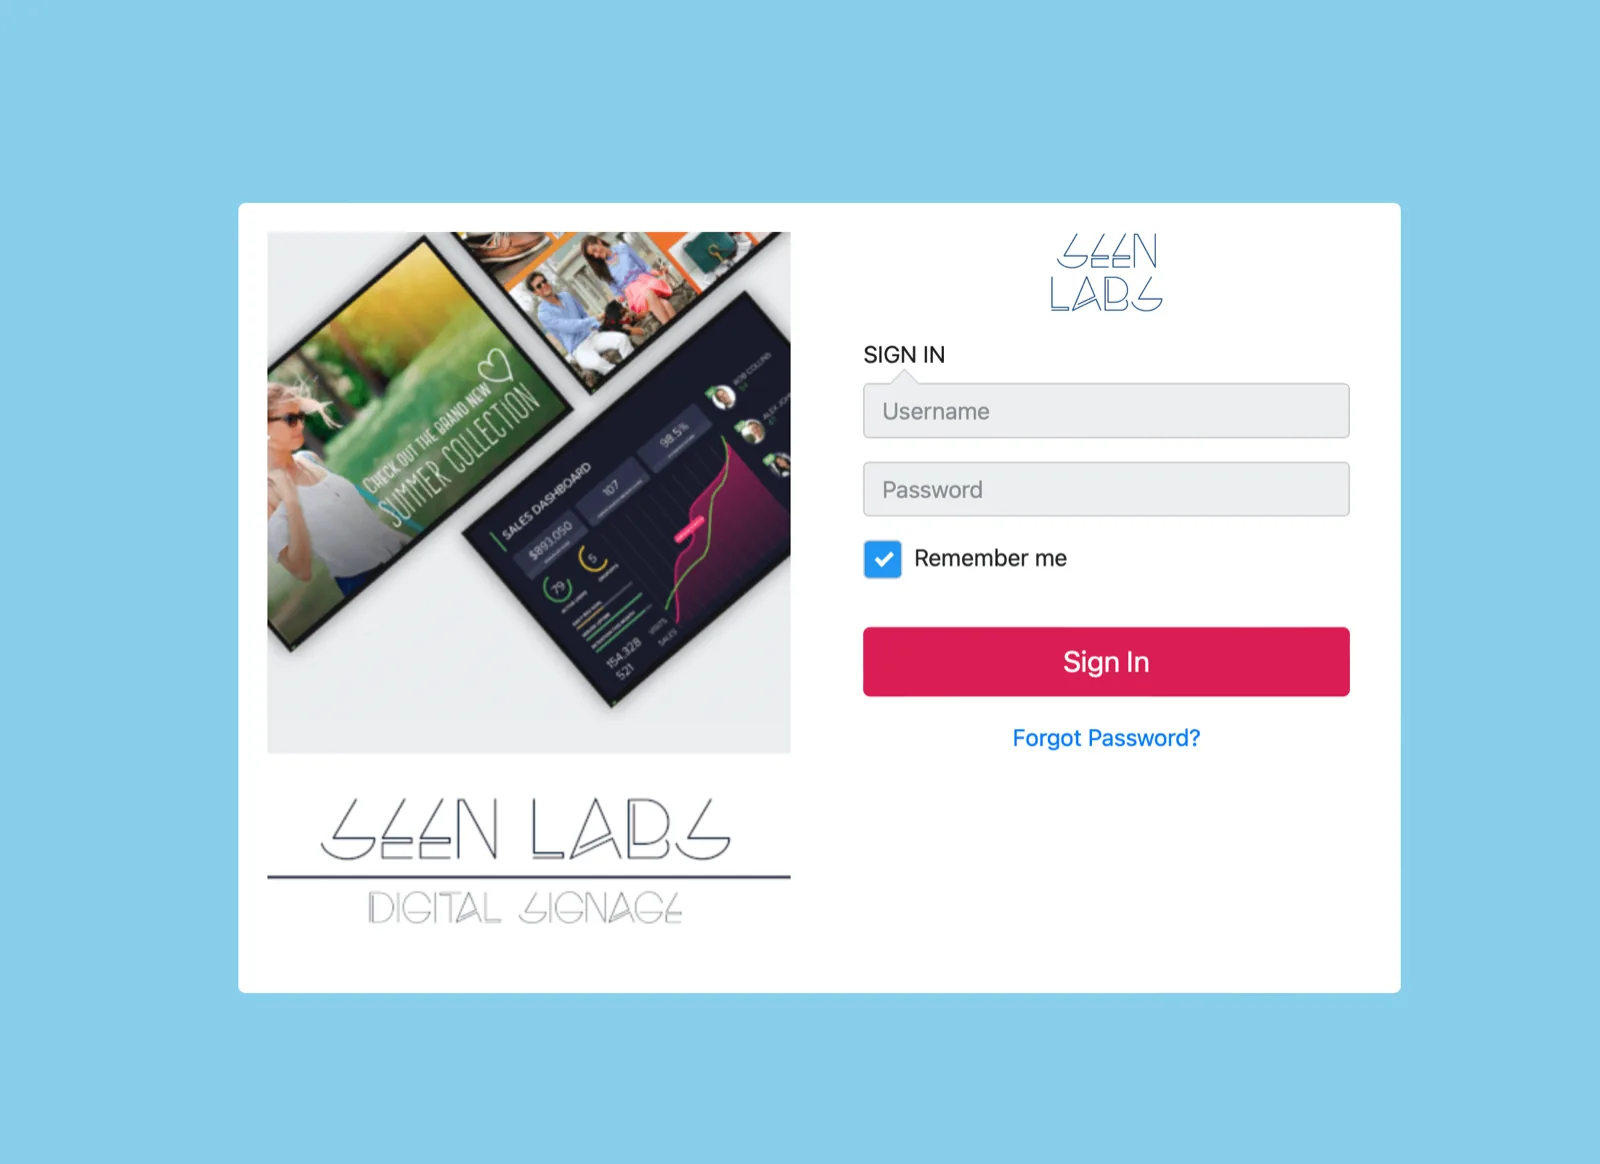
- Open the sign-in address from your welcome email in Google Chrome. Chrome is the browser we recommend for the platform.
- Enter your username and password.
- Bookmark the page once you are in. You will come back to it every time you change content.
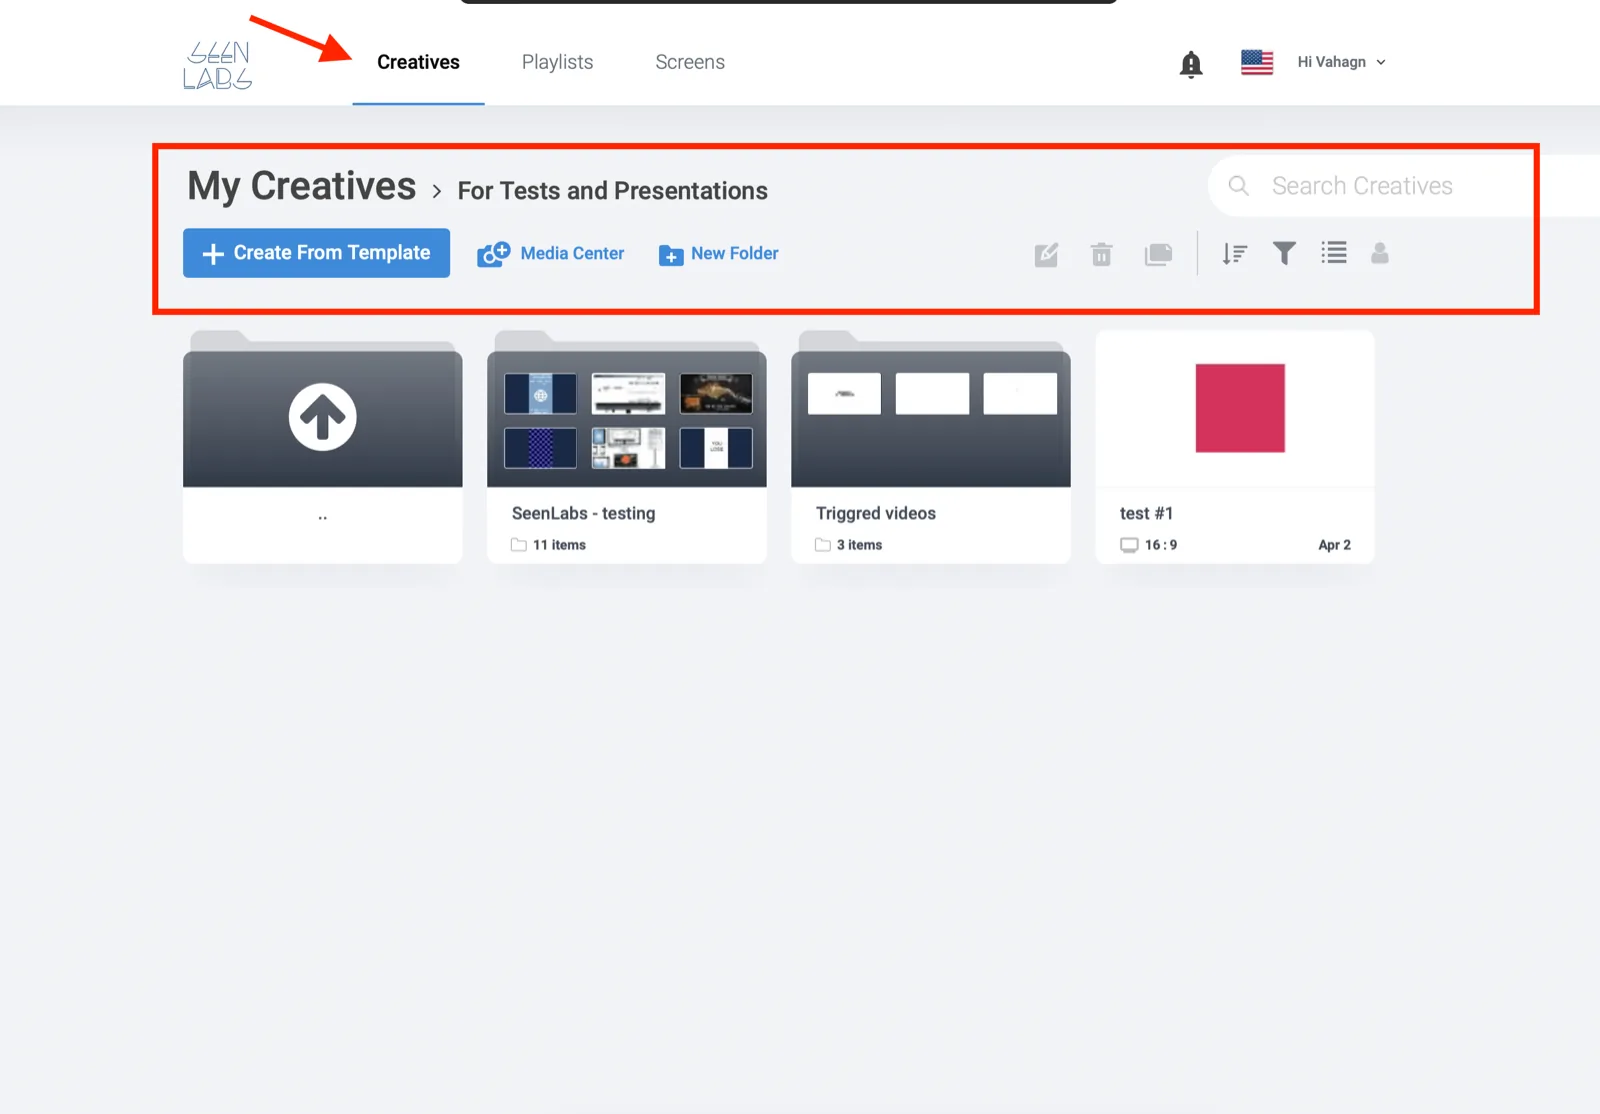
After sign-in you land on a dashboard with a top bar. The three tabs you will use are Creatives, Playlists, and Screens. They map directly to the next three steps: make the content, decide the order, send it to a screen.
03Make a Creative
A creative is one piece of content — a promotion, a menu board, a welcome message. It is the smallest unit the screen can play.
Start from a template
- Open the Creatives tab.
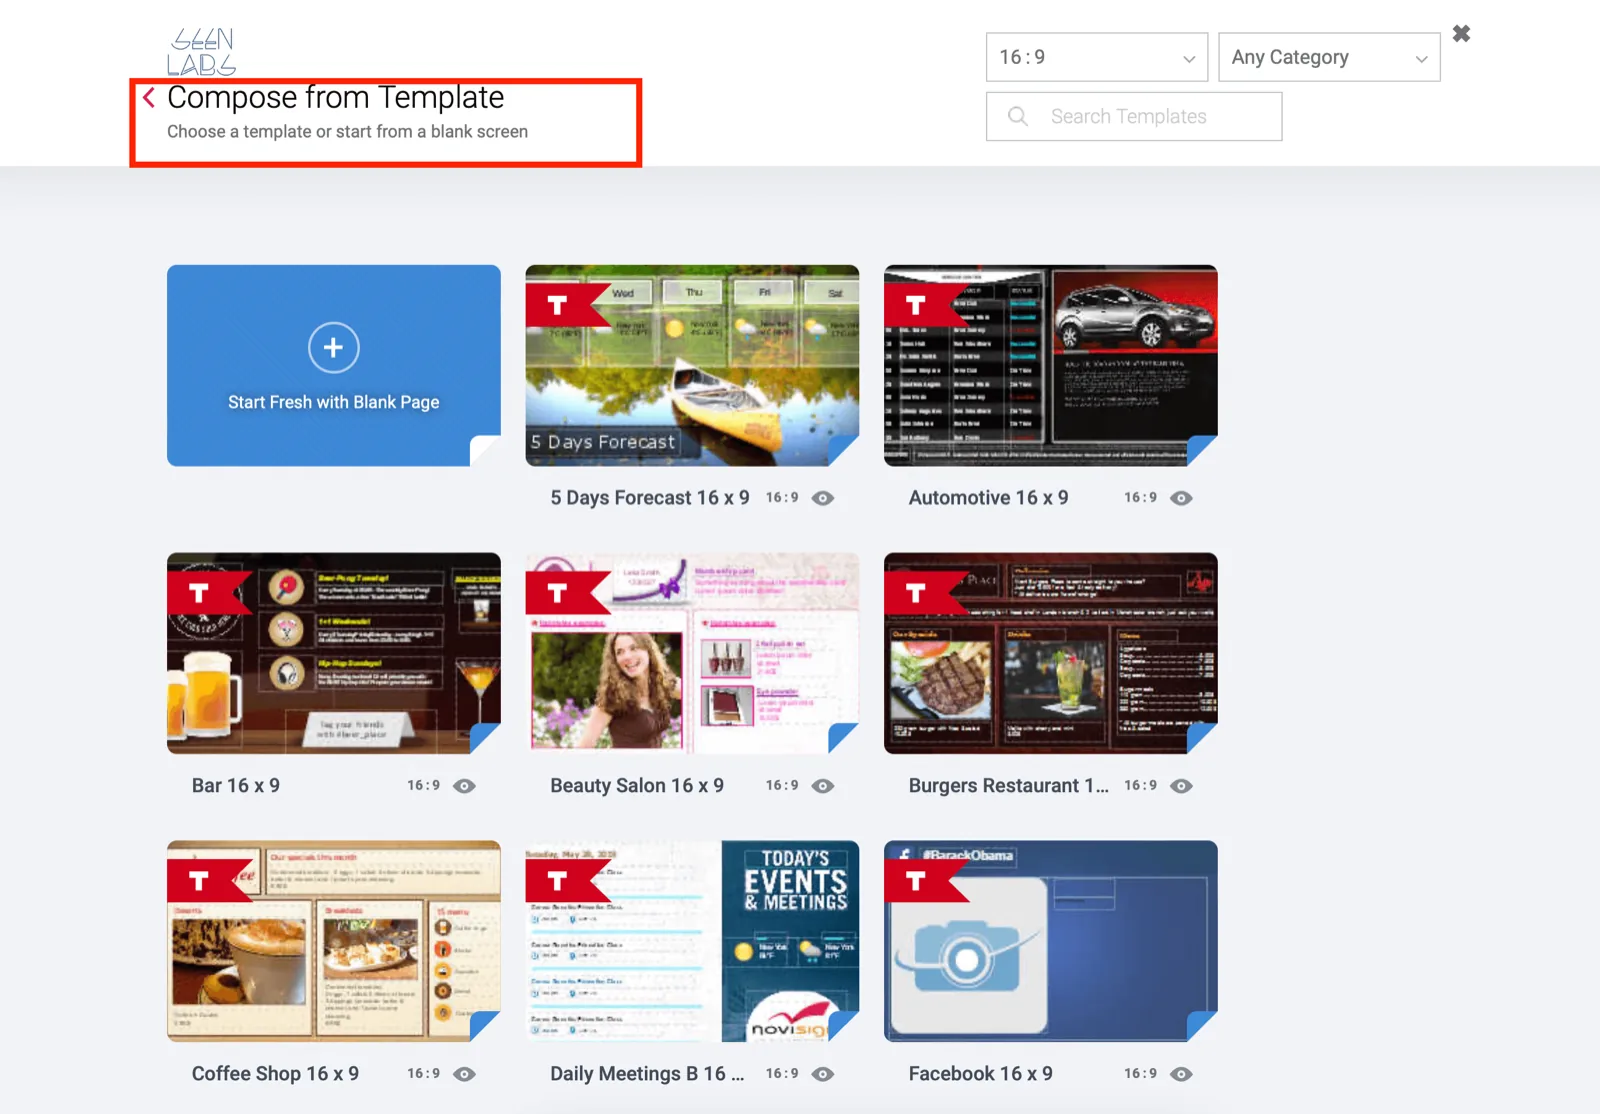
- Click Create from Template. Pick a template that is close to what you want, or start from a blank one.
- Give the creative a name and a short description. Use a name you will still recognize in three months — Lobby — Summer Hours beats new1.
- Set the orientation and aspect ratio. The default is 16:9. Change it to 9:16 if the display is mounted in portrait.
- Click through to the composer.
Work in the composer
The composer has four parts:
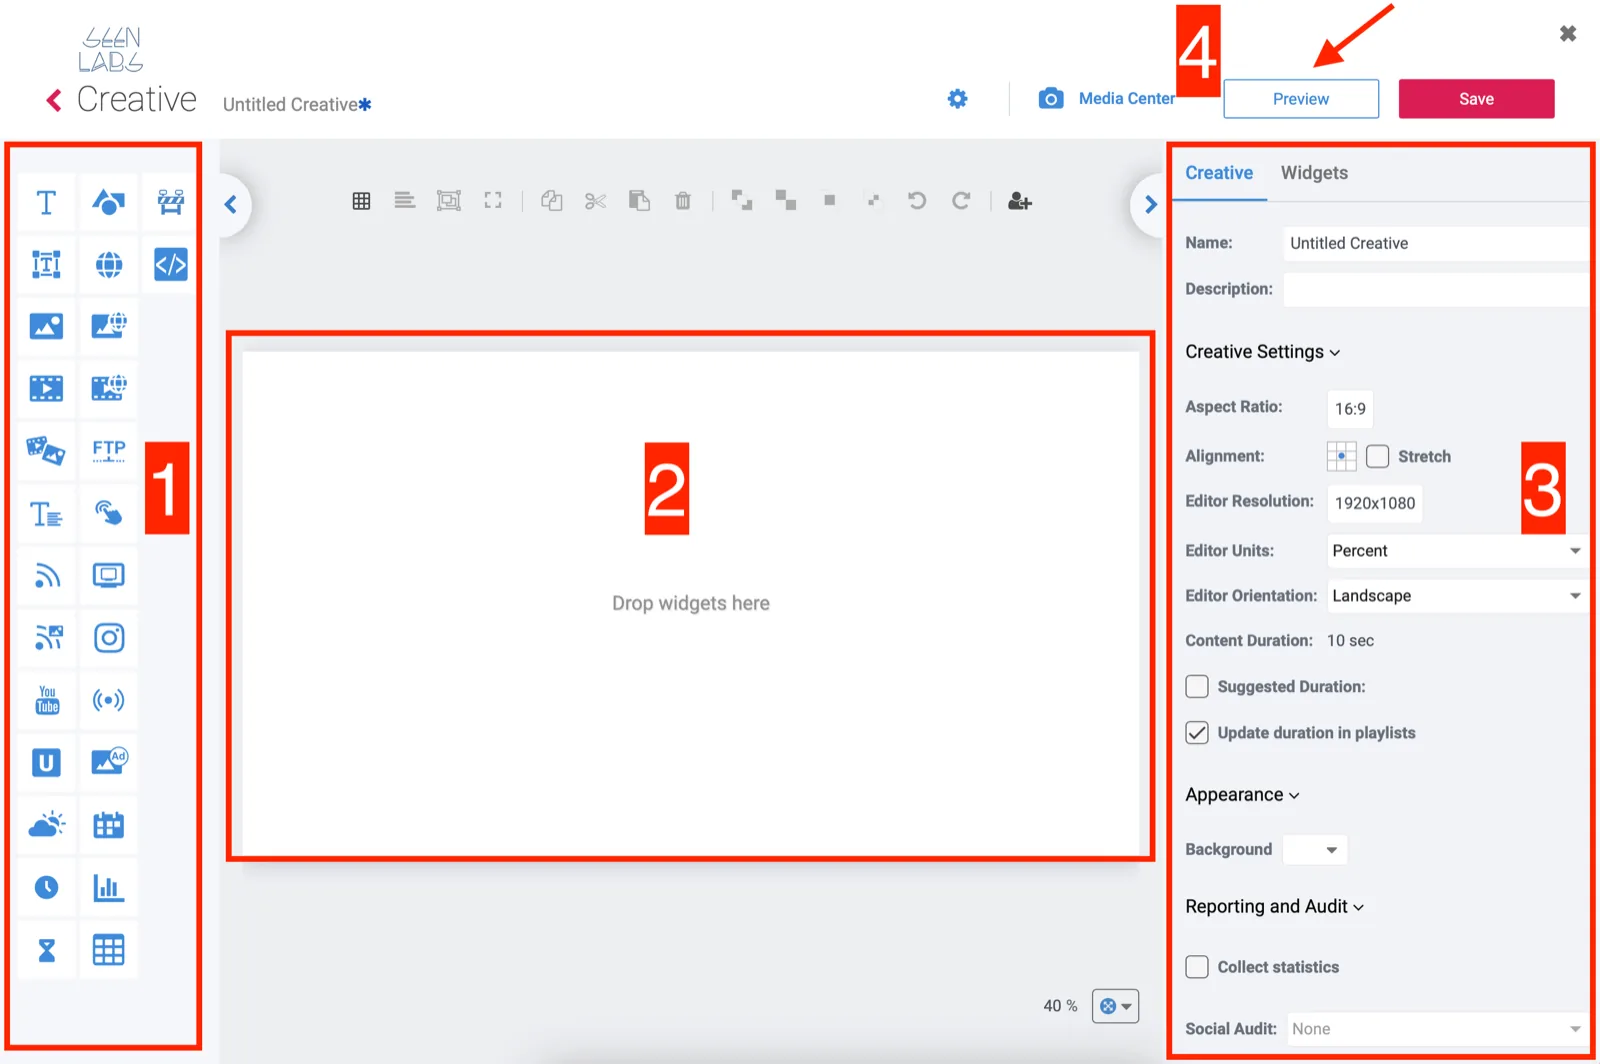
To place an image or a video, drag the matching widget onto the canvas, then pick the file from the Media Library. Upload the file first if it is not there yet. Check the file format rules before uploading anything.
Keep the library tidy
- New Folder: group creatives by location or by campaign. Do this from day one — sorting 200 loose files later is painful.
- Duplicate: the fastest way to make a seasonal variant. Copy, rename, change the dates and the artwork.
- Sort and filter: finds a creative by name when the list gets long.
- View: switches between thumbnails and a list. Thumbnails are easier when you are looking for artwork you recognize.
04Build a Playlist
A playlist is the running order. A screen plays a playlist, never a single creative, so you need at least one even if it holds one item.
- Open the Playlists tab and click New Playlist.
- Add your creatives to it.
- Drag the rows to set the order. The playlist loops from the top when it reaches the end.
- Set a duration for each item. Ten to fifteen seconds suits most static creatives. Video runs for its own length.
- Add a schedule if the content is time-bound — a start date, an end date, or a time of day. A lunch menu that stops at 15:00 is a schedule, not a separate playlist.
- Save the playlist.
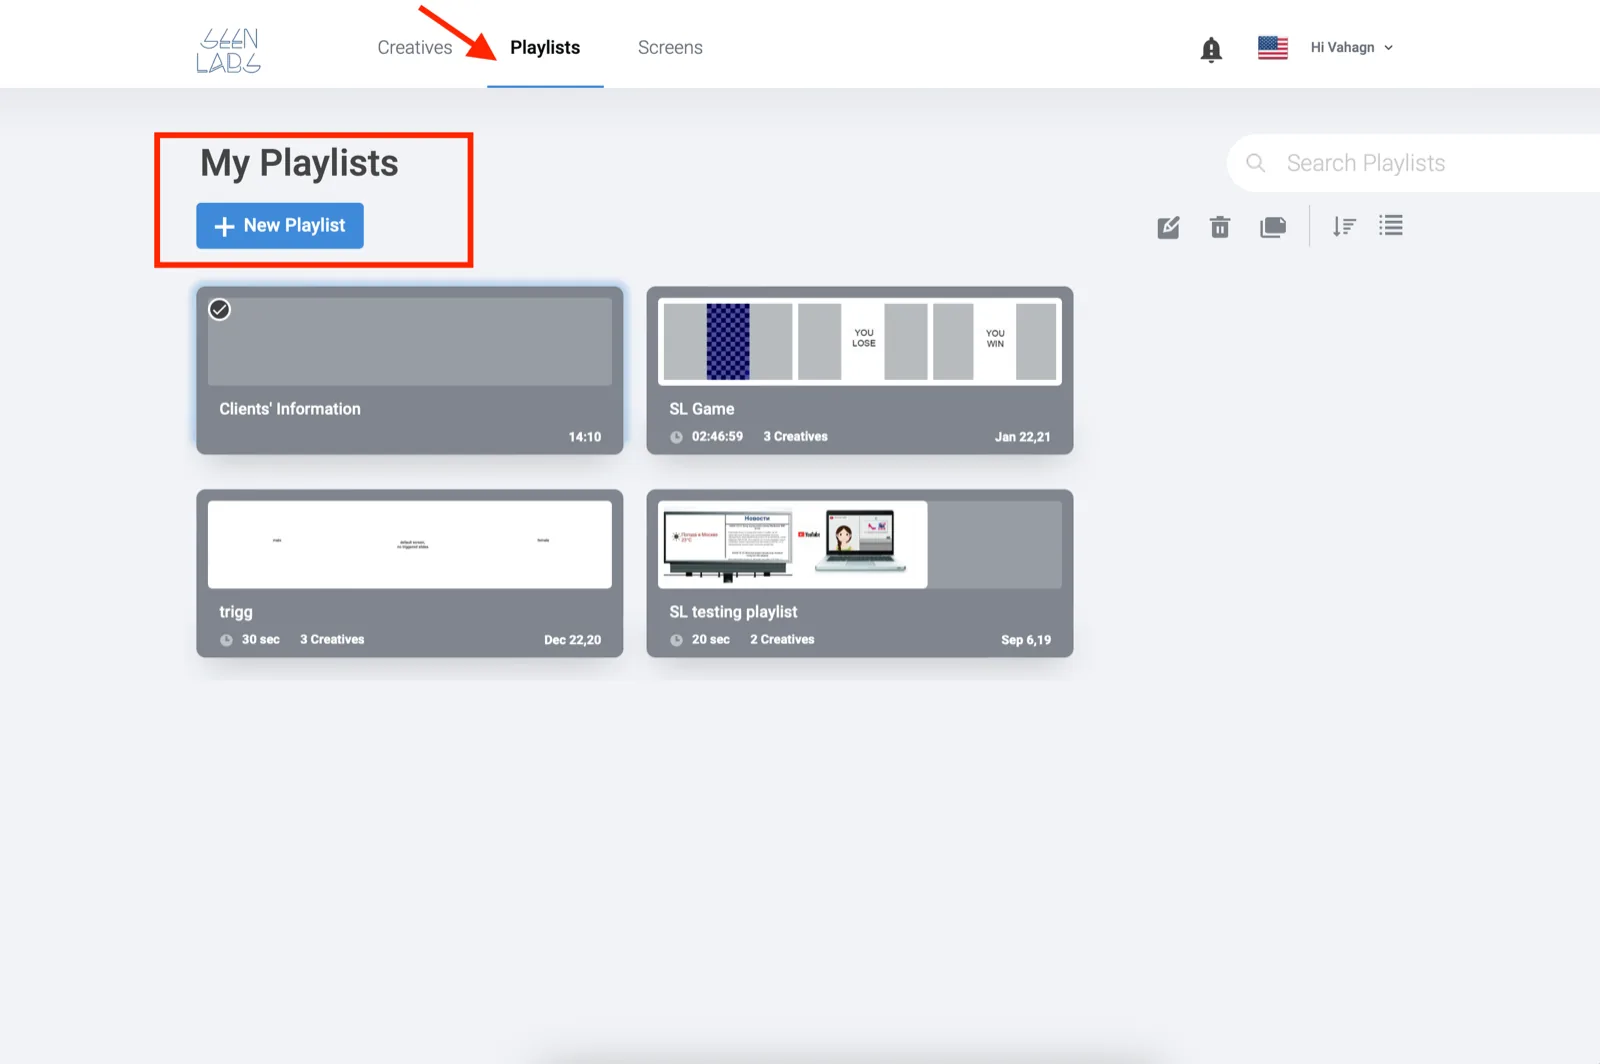
Schedules run on the timezone set for the screen, not on the timezone of the browser you are working in. If you manage screens in more than one region, check that field before you trust the timing.
05Add the Screen
A screen in the platform is the record that represents one physical display. Creating it is what gives you something to assign a playlist to.
- Open the Screens tab and click New Screen.
- Name it after its physical location — Store 14 — Front Window, not Screen 3. You will be reading this name from a support ticket one day.
- Set the orientation to match how the display is mounted.
- Assign the playlist you built in step four.
- Click Create.
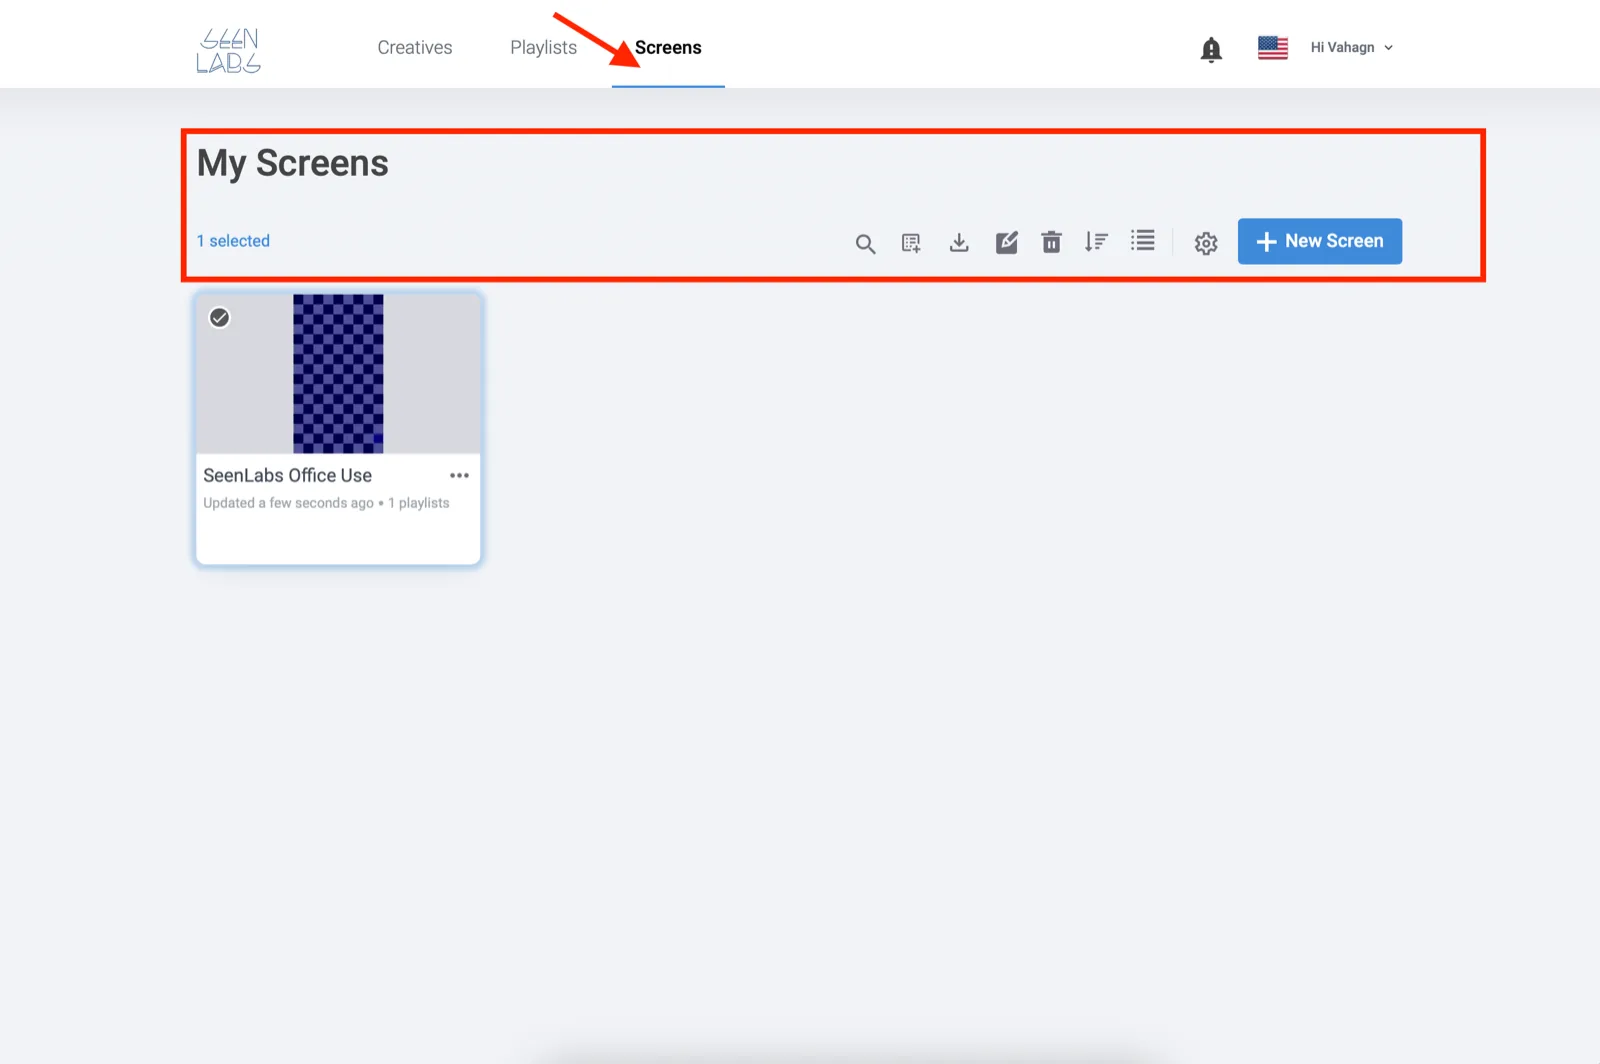
The screen will show as offline until a media player is bound to it. That happens in the next step.
06Connect the Media Player
The player is the box that pulls content down and drives the HDMI input. This is the only step that involves hardware.
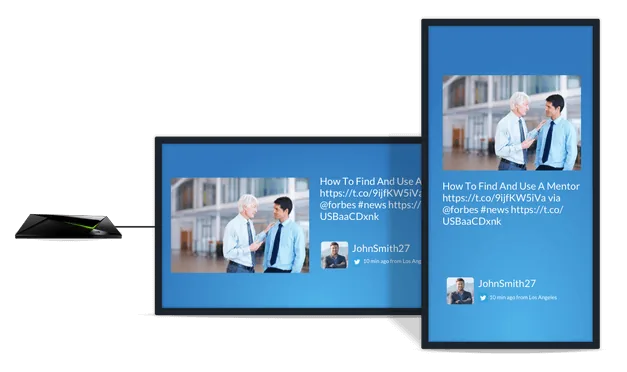
- Plug the player into the display's HDMI input and into power. Switch the display to that HDMI source.
- Connect the player to the network. Ethernet if you can, Wi-Fi otherwise.
- Install the SeenLabs player app on the device if it did not ship with it.
- Open the app and sign in with your platform credentials.
- Bind the device to the screen record you created in step five. The device ID is printed on the device label and also shown on screen by the app.
- Wait for the screen entry in the Screens tab to go online, then confirm the playlist is playing on the actual display.
Once the player is bound, everything else happens from the browser. You never need to touch the hardware again to change content.
File Formats That Work
Most "the file won't play" tickets are a format problem, and every one of them is avoidable before upload.
| Item | Rule |
|---|---|
| Image formats | PNG, JPG, GIF. |
| Video format | MP4 encoded with H.264. This is the combination to use unless we have told you otherwise — other containers and codecs may fail to play, so convert before uploading. |
| Video resolution | Match the resolution of the display. Video larger than the screen gains you nothing and can cause playback errors on lower-powered players. |
| Color mode | RGB only. A CMYK image plays as a black screen. Re-export it from your design tool as RGB. |
| File size | Smaller is better. Large files slow the composer down and take longer to reach the screen. |
If a video was exported with the wrong codec or at the wrong size, you do not need to re-shoot it — see Video Format Conversion for how to convert it.
Troubleshooting
Work top to bottom. The first two rows account for most cases.
| Symptom | What to do |
|---|---|
| Screen shows nothing after setup | Check the player is powered on, the display is on the right HDMI source, and the player has network. Then check the Screens tab — the entry should read online. If it does not, restart the player and give it two to three minutes to reconnect. |
| Screen is online but the old content is still playing | Confirm you saved and published both the creative and the playlist, and that the right playlist is assigned to that screen. Updates are not instant — the player fetches them on its own schedule. Wait a couple of minutes, then force a refresh from the screen entry. |
| Player will not bind to the account | Re-check the device ID against the device label, character by character. If it is right, the network is blocking the connection — see the network note in step six. |
| Uploaded video will not play | Play the file locally to confirm it is not corrupt. Then check it against the format table above — MP4 with H.264, sized to the display. |
| Picture plays as a black screen | The image is CMYK. Re-export it as RGB and upload it again. |
| Black bars, or content cut off at the edges | The creative's aspect ratio does not match the display. Rebuild it at the correct ratio — 16:9 for landscape, 9:16 for portrait — and preview before deploying. |
| Composer is slow | Large media is the usual cause. Compress your images and export video no larger than the display needs. Several small files perform better than one huge one. |
| Scheduled content not appearing | Check the screen's timezone and confirm the schedule dates have not already expired. |
Common Questions
How long does the first setup take?
Around 20 to 30 minutes if the hardware is already mounted and you have your login. That covers signing in, one creative, one playlist, and getting the player online. Designing content you are happy with takes as long as it takes.
Do I need technical skills?
No. The composer is drag and drop, and the templates cover most cases. If you can edit a presentation, you can build a creative. Step six is the only part that touches hardware, and it is one cable and one sign-in.
Can I update content remotely?
Yes. Once a player is bound, you change content from the browser, anywhere. The screen picks up the change on its next check-in — quick, but not instantaneous. Verify on the actual screen before you walk away.
What happens if the internet drops?
The player keeps playing the content it has already downloaded, so a short outage does not blank the screen. It cannot receive new content until the connection is back.
How many screens can one account manage?
One dashboard covers a single screen or a large estate across many sites. Tell us before you add locations so we can check your account is set up for them.
Who manages this if we would rather not?
We do. Content, scheduling, and monitoring can be run for you as a managed service.
Stuck? We'll sort it out.
Email us a photo or short video of what the screen is doing — it's usually all we need to diagnose the issue on the first reply.