01Before the Visit
Two things decide whether this job takes two hours or gets abandoned: the floor, and whether a second pair of hands is available.
| Time on site | Up to 2 hours. SeenLabs estimate, not a manufacturer figure. |
|---|---|
| Unit weight | 82 kg / 181 lb |
| People | Two for the raise. See Raise & bolt. |
What you bring
- Impact or hammer drill with a 16 mm masonry bit that can reach 110 mm depth.
- A tile or ceramic bit as well, if the floor is tiled — see Floor types.
- Adjustable wrench for the expansion bolt nuts, and a hammer.
- Level, tape measure, marker.
- Vacuum or brush. This is usually a retail floor and the dust is yours to clear.
What is in the crate
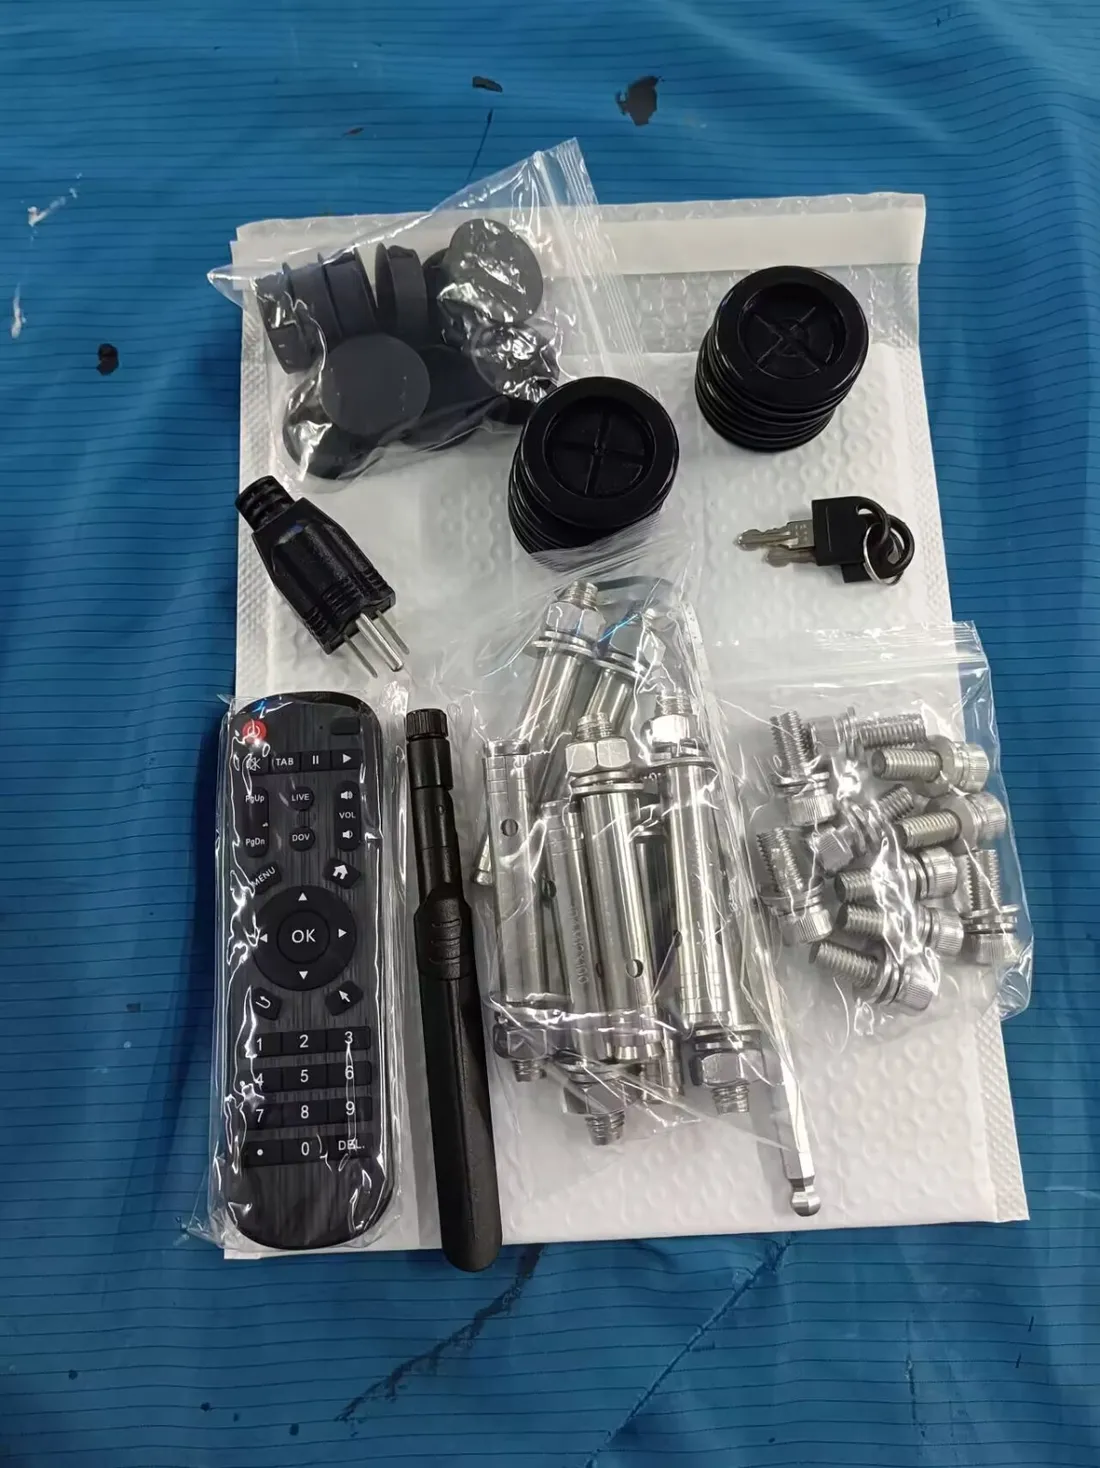
- M12 expansion bolts — eight, for the floor.
- Screws and a hex key — for fixing the screen to the bracket.
- Remote control, Wi-Fi antenna, power plug, keys, plus plastic caps and feet.
02Floor Types
The anchor spec assumes a concrete slab. Establish what the floor actually is before the day — it decides which bits are needed, and in one case whether this bracket can be used at all.
| Floor | What it means |
|---|---|
| Bare concrete | The standard case. Masonry bit, hammer action on. |
| Tile over concrete | Bring a tile or ceramic bit as well. Break the glaze at low speed with hammer action off, then switch to masonry for the slab. A masonry bit used from the start chips the tile face, and the chip stays visible. |
| Timber, raised or hollow | Do not proceed on the supplied expansion bolts — they need solid material to expand into. What replaces them depends entirely on what is underneath, so this needs settling before the unit is on site, not on the day. |
03Set Out the Anchor Pattern
Nothing is adjustable once the bolts are set. Everything that needs checking gets checked now.
| Spec | Value |
|---|---|
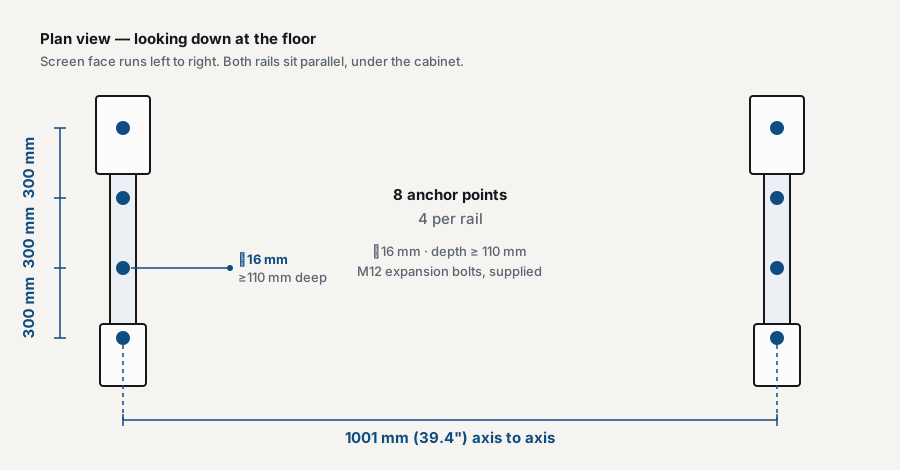
| Anchor points | 8 total — 4 per rail |
| Spacing along a rail | 300 mm (11.8") centre to centre |
| Between the rails | 1001 mm (39.4") axis to axis |
| Hole diameter | 16 mm |
| Hole depth | at least 110 mm |
| Bolt | M12 expansion bolt, supplied |
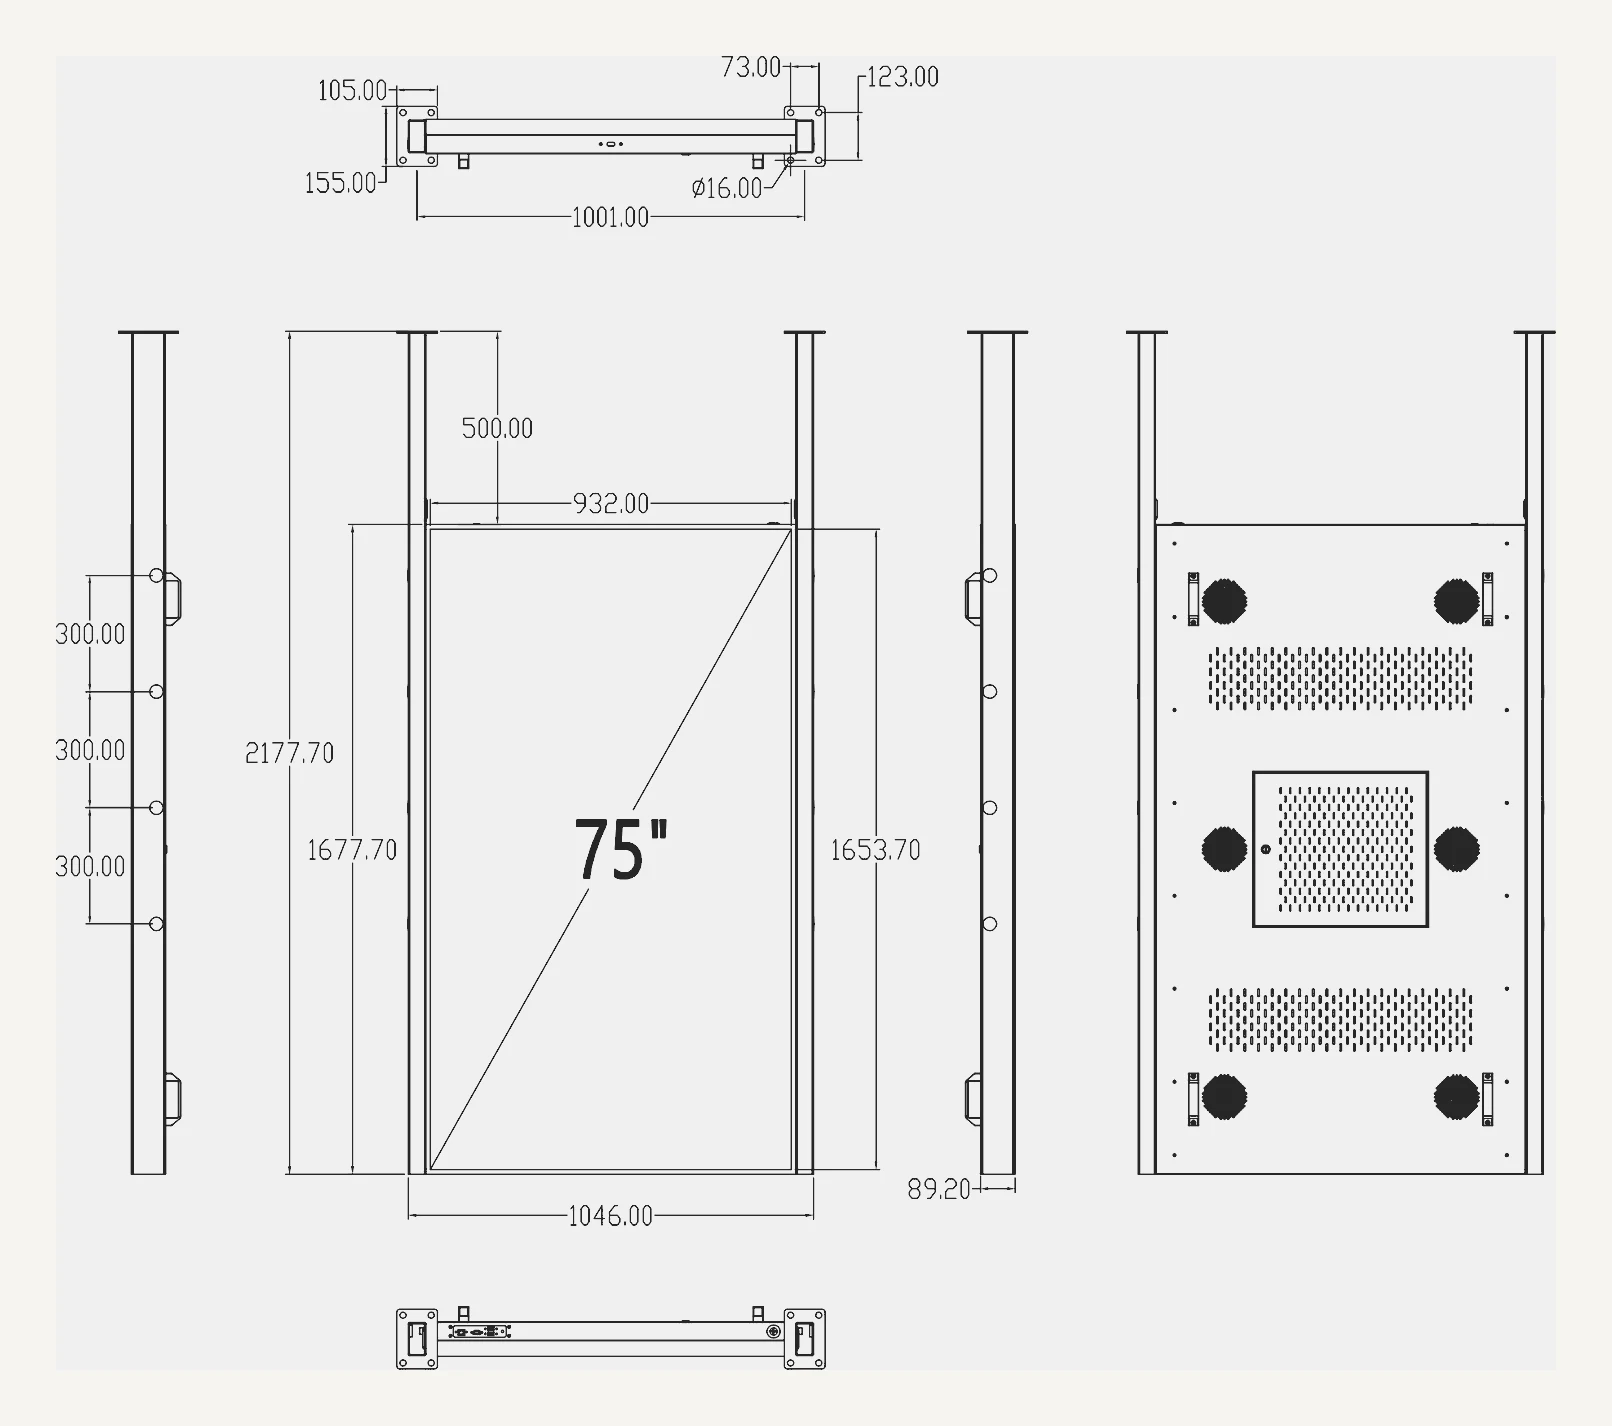
| Anchor plate footprint | 105 × 155 mm at one end, 73 × 123 mm at the other |
- Mark the two rail axes 1001 mm apart.
- Mark four holes per rail at 300 mm centres.
- Check square, check level, and check the diagonals match before any bit touches the floor.
Where the screen ends up
| Element | mm | inches |
|---|---|---|
| Overall height including bracket | 2177.7 | 85.7" |
| Cabinet | 1046 × 1677.7 | 41.2" × 66.1" |
| Active screen area | 932 × 1653.7 | 36.7" × 65.1" |
| Depth | 89.2 | 3.5" |
| Screen bottom edge above floor | 500 | 19.7" |
04Assemble the Screen to the Bracket
On the floor, flat, before anything is raised. Doing this after the raise means holding 82 kg of glass with one hand.
- Lay the display face-up, or face-down only on a padded surface.
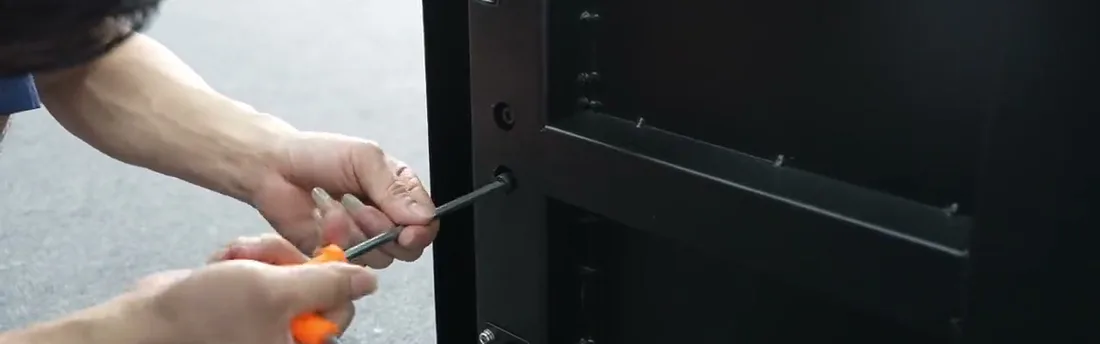
- Offer each bracket rail up to the back of the cabinet and drive the supplied screws home with the hex key.
- Fit both rails, then check the assembly sits square before it goes anywhere near the drilled holes.
05Drill All Eight Holes
All eight, before the unit is raised. This is what makes the raise short and what makes a one-person raise survivable if it comes to that.
- Drill each hole 16 mm diameter, at least 110 mm deep. Mark the depth on the bit with tape if it has no stop.
- On tile: ceramic bit, low speed, hammer off until the glaze is through. Then masonry bit, hammer on.
- Vacuum or brush every hole out. Dust left in the hole stops an expansion bolt seating properly.
06Raise and Bolt Down
The raise is the single point in this job where the screen gets damaged. Plan it before you lift.
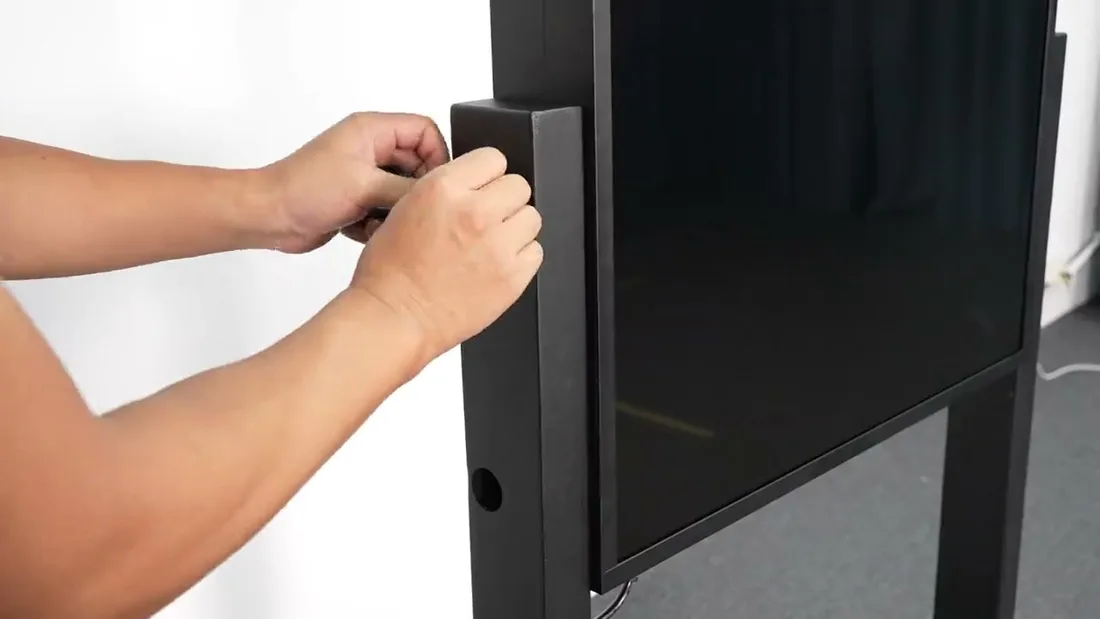
- Two people. One steadies the unit, one starts the bolts.
- Raise the assembled unit and align the rail plates with the drilled holes.
- Fit all eight M12 expansion bolts and tighten them. The unit is only secured once all eight are tight — until then someone keeps a hand on it.
07Cable and Power
The cable leaves through the bracket, not around it.
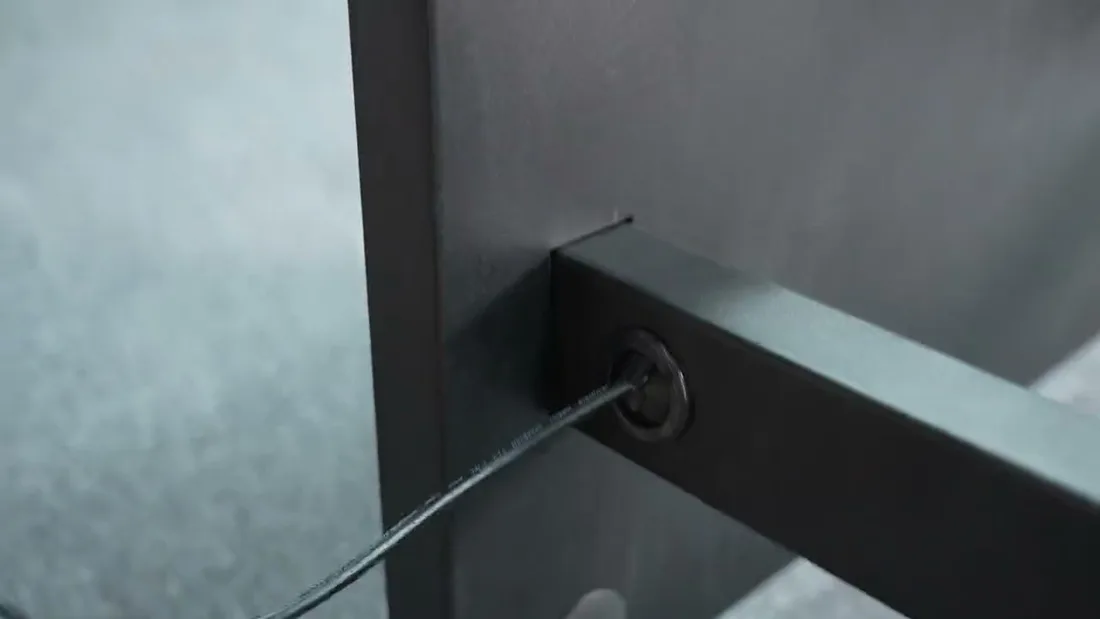
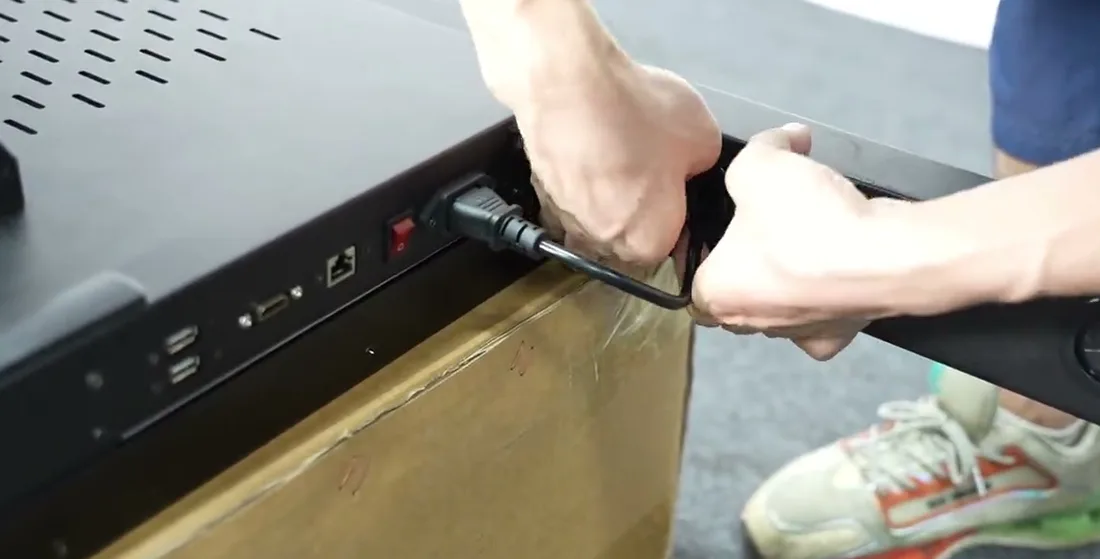
- Route the power cable out through the exit at the base of the rail.
- Connect power and set the rocker switch to on.
- The display works on power-up. No hardware configuration is needed at this stage.
08Get It Playing
A mounted screen with no software is a black panel. About 10 minutes. Each screen has its own activation code, and it is handed over when the screen is ready to take it rather than in advance — so have it to hand before you start this section.
- Wi-Fi first. In the Android settings, join the site network and confirm the internet actually works. Nothing below succeeds without it.
- Install the player app. Open the download link in the screen's own browser, or copy the installer onto a USB stick and open it with the file manager. In the app list it appears as OnSignage — that is the right app, listed under the vendor's name rather than ours.
- Enter the activation code for this screen, exactly as given, hyphens included. Paste it if you can — mistyping is the usual reason it is rejected.
- Enable auto-start (auto start / start on boot) so the screen returns to playback by itself after a power cut.
- Press GO and confirm content plays.
| Symptom | Try this |
|---|---|
| Black screen, or "no connection" | Check Wi-Fi is actually online, then reopen the app. |
| Activation code rejected | Look for a stray space at the start or end. Retype rather than guess. |
| App will not download | Put the installer on a USB stick and open it with the file manager on the screen. |
| Content plays, but not after a reboot | Auto-start is not enabled. Go back into the app settings and set it. |
09Before You Pack Up
Five minutes now saves an argument later. Once the unit is bolted down and the trim is back, most of this becomes impossible to check without unbolting it again.
- Push-pull test. Hand pressure at the top of each rail, front to back. Any movement means a bolt has not expanded properly — find it now, not in six months.
- Re-check level on the finished install. A window display sits against vertical mullions and reads crooked from the pavement long before a spirit level says so.
- Confirm the power cycle. Switch the unit off at the wall, wait, switch it on, and watch content come back by itself.
- Clear the dust. This is a shop floor. Drilling swarf on tile is what the owner remembers.
Worth photographing
Not paperwork — a record that answers questions later, when the screen is against a wall and nothing is accessible.
- The anchor positions before the caps go on, so the fixing pattern is documented if the unit is ever moved or the floor is ever queried.
- The finished install, straight on with content playing, and from the customer's side of the glass. This is the shot worth having.
- The outlet and cable route, which is the first thing anyone asks about when the screen goes dark months later.
10FAQ
Does the unit have to be anchored into the floor?
Treat it as required. The bracket is supplied with eight M12 expansion bolts and the manufacturer's drawing specifies an eight-point pattern, which is the configuration this guide covers. An 82 kg glass panel standing 2.2 m tall in a public doorway is not something to judge by eye — if a site genuinely cannot be drilled, that is a conversation to have before the unit ships, not a decision to take on the day.
How many people does the raise need?
Two. The unit is 82 kg and the glass has no protective layer. One person can manage only if all eight holes are drilled first and the bolts go in immediately, without letting go.
The floor is tiled. Can I drill straight through?
Not with a masonry bit from the start — it chips the glaze, and the chip is permanent and visible. Break the tile with a ceramic bit at low speed with hammer action off, then switch to masonry with hammer on for the slab.
Which side does the power cable come out?
At the base of one bracket rail, at floor level. Confirm which rail before the visit, because it decides which side the outlet has to be on.
Is the job finished once the screen is bolted down?
No. The screen has to be on Wi-Fi, the player installed and activated, and playback confirmed to survive a power cycle. See Get it playing.
Stuck? We'll sort it out.
Send a photo of the floor, the bracket, or whatever the screen is doing — it is usually all we need to answer on the first reply. If something on site does not match this guide, ask before improvising: the awkward cases are almost always the floor, and they are cheap to solve before the drill comes out.
This is the general guide for the model. Anything specific to one site — floor construction, access, where the power lands — is worked out for that installation separately.